


If you work in nuclear power, medical labs, or industrial sites handling radioactive materials, you know how critical a surface radiation contamination monitor is. It’s not just a piece of gear—it’s your first line of defense against unplanned exposure, and getting its settings right can make the difference between a safe shift and a preventable incident. As a supplier of radiation monitoring tools, I’ve spent years walking users through this process, and I can tell you: most people skip small, key steps that throw their monitor’s accuracy off. Today, I’m breaking down how to adjust your Surface Radiation Contamination Monitor (SRCM) settings like a pro, without the jargon or confusion.
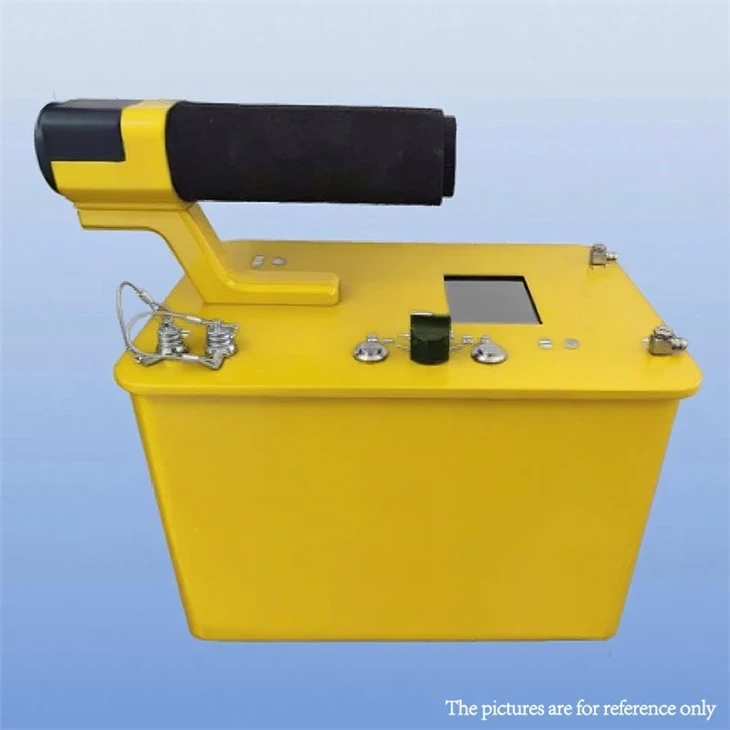
First, let’s start with the basics: what even is an SRCM, and why do its settings matter? Unlike personal dosimeters that track your exposure over time, an SRCM is made to scan surfaces (tools, workbenches, floors) for leftover radioactive particles—think alpha, beta, or gamma contaminants. If your settings are off, you might miss a small contamination spot, or trigger false alarms for low-level background radiation. I’ve seen this happen so many times: a tech gets a random beep, panics, and shuts the monitor off, only to find out later there was a real contamination they missed because they didn’t calibrate for their specific site.
Step 1: Confirm the Detector Type and Target Radiation Mode
The first setting you need to lock in is your detector’s sensitivity and target radiation type. SRCMs use different sensors—Geiger-Müller (GM) tubes, scintillators, or semiconductor detectors—each optimized for different radiation types. For example, GM tubes are great for beta and gamma, but not alpha, which gets blocked by thin materials like plastic. Scintillators handle all three, but they’re more sensitive to background noise.
Before adjusting any other settings, check your site’s primary contamination risk. If you work with nuclear power plant tools that use gamma-emitting isotopes like cobalt-60, you’ll want to set the monitor to gamma-only mode. If you’re in a medical facility handling beta sources for cancer treatments, switch to beta. A lot of users just leave it on “all radiation” mode, which floods your readings with background and makes real contamination harder to spot. I always tell new clients this: match the mode to your daily tasks, not the default setting.
This is also where picking the right companion tool comes in. If you’re a contractor moving between sites with varying radiation types, a portable radiation dosimeter that lets you toggle modes on the fly (link here: /radiation-dosimeter/radiation-dosimeter-for-radioactive-materials/portable-radiation-dosimeter.html) can save you time. No need to swap monitors every time you change jobs—just adjust the mode on your device.
Step 2: Calibrate Background Radiation Levels
This is the make-or-break step. Every site has natural background radiation: from cosmic rays, rocks, even the concrete in your building. If you don’t calibrate your SRCM to ignore this, your monitor will beep constantly for no reason. How do you do this? Most modern SRCMs have a “background calibration” button, usually with a symbol that looks like a flat line or a B. Here’s the trick: do this when the monitor is turned on, sitting on a clean, uncontaminated surface, and not near any active radiation sources. Don’t calibrate right after you scanned a radioactive tool—wait at least 10 minutes to let the monitor reset.
I’ve had a contractor tell me they were wasting 2 hours a day turning off false alarms because they skipped calibration. Once we walked them through it, they cut that time to zero. If you’re a contractor juggling multiple sites with different background levels, a radiation dosimeter with alarm (link here: /radiation-dosimeter/radiation-dosimeter-for-radioactive-materials/radiation-dosimeter-with-alarm.html) that lets you save multiple background profiles is a game-changer. No need to re-calibrate every time you move—just pull up the profile for your current site.
Also, for folks working in medical settings where radioactive materials are handled daily, a radiation dosimeter for medical radiation workers (link here: /radiation-dosimeter/radiation-dosimeter-for-radioactive-materials/radiation-dosimeter-for-medical-radiation.html) is designed with background calibration for clinical environments. It’s built to adjust to the slightly higher background in labs and treatment rooms, so you won’t get false alarms when you’re trying to keep up with patient care.
Step 3: Set the Alarm Thresholds Correctly
The alarm is your monitor’s biggest alert, but if you set the threshold too low, you’ll get spammed with beeps; too high, and you’ll miss real contamination. Let’s define threshold: it’s the radiation level (measured in counts per minute, or CPM) that triggers an alarm. Most SRCMs come with a default threshold of 1,000 CPM, but that’s not one-size-fits-all.
Here’s how to tweak it: start with your site’s regulatory limits. For example, the NRC (U.S. Nuclear Regulatory Commission) says surface contamination limits for general work areas are 2,000 CPM for beta and gamma, and 0.05 disintegrations per minute (DPM) for alpha. If you set your alarm 10-15% below that limit, you’ll get a heads-up before you hit a regulatory threshold. But don’t go lower—if you set it to 500 CPM, you’ll alarm every time your monitor picks up a stray cosmic ray, which happens all the time in buildings with high concrete ceilings.
Another pro tip: use different alarm types for different settings. Some SRCMs let you set a visual alarm (a flashing light) for low-level warnings and a loud audio alarm for critical contamination. That way, you don’t miss a dangerous alert even if you’re in a noisy work site. For contractors managing multiple teams, a radiation monitoring for contractors (link here: /radiation-dosimeter/radiation-dosimeter-for-radioactive-materials/radiation-monitoring-for-contractors.html) gives you centralized access to all your monitors’ alarm settings, so you can make sure every tool across your crew is set consistently. No more worrying about a tech on a remote site having a misconfigured monitor.
Step 4: Adjust Scanning Speed and Averaging Time
When you run your SRCM over a surface, the monitor takes readings at set intervals. If the intervals are too fast, the readings are jumpy and inconsistent; too slow, and you’ll miss a small contamination spot. Most SRCMs have two settings here: scan speed (how often it takes a reading) and averaging time (how many readings it uses to get a final number).
For flat, open surfaces like workbenches, use a medium scan speed (1-2 seconds per reading) and an averaging time of 5-10 seconds. This smooths out random spikes from background radiation without making you move too slow. For irregular surfaces like tools with lots of crevices, use a slower scan speed (3-5 seconds) so you don’t rush over a small crack that might hold contamination.

I once had a client who was scanning a set of wrenches and kept missing a spot on a socket head—they were moving too fast, using a 0.5-second scan speed. When they adjusted to 3 seconds per reading, they found the contamination in 2 minutes. It’s a small setting, but it makes a huge difference when you’re checking multiple tools in a row.
Step 5: Verify Settings with a Test Source
Once you’ve adjusted all the settings, you need to make sure they’re actually working. Don’t just rely on the monitor’s self-test—use a small, low-activity radioactive test source (like a cesium-137 check source, usually 1 microcurie or less) to confirm. Here’s how: place the test source on a clean surface, scan it with your SRCM, and check if the reading matches the expected level (you can find this on the test source’s label). If it doesn’t, go back and tweak your detector mode or alarm threshold—don’t assume the monitor is broken.
A lot of users skip this step, but it’s non-negotiable. I’ve had a monitor that seemed to work fine, but had a misaligned sensor that made it underread by 30%—if I didn’t test it, I would have been missing real contamination all week. This is also where a personal neutron and gamma dosimeter (link here: /radiation-dosimeter/radiation-dosimeter-for-radioactive-materials/personal-neutron-dosimeter.html) can help as a cross-check. For sites that handle neutron radiation, you can use the dosimeter to verify your SRCM’s neutron settings, since neutrons are a different type that many general SRCMs don’t detect well.
Final Pro Tips for Maintaining Settings
Adjusting the settings is only half the battle—you have to keep them consistent. Here’s what I tell all my clients:
- Re-calibrate daily: Background radiation can shift a little with humidity, temperature, even the time of day. A quick calibration before your shift takes 30 seconds and keeps your readings accurate.
- Label your profiles: If you have multiple background profiles for different sites, label them clearly (e.g., “Nuclear Plant Unit 3” vs. “Hospital Oncology Lab”) so you don’t load the wrong one mid-scan.
- Update firmware: Most SRCMs get firmware updates that fix sensor issues or add new mode options. Don’t skip these—they’re free and can make your settings work better.
Now, if you’re looking for a reliable SRCM that’s easy to adjust and meets all your site’s needs, or if you need any of the companion tools I mentioned (the portable dosimeter, alarm-equipped monitor, or contractor monitoring system), reach out to our team. We’ve helped hundreds of teams get their radiation monitoring set up correctly, and we can walk you through every step, from initial setup to ongoing calibration.
References
- U.S. Nuclear Regulatory Commission. (2022). Surface Contamination Monitoring Requirements. Retrieved from nrc.gov
- International Atomic Energy Agency. (2021). Radiation Monitoring Equipment Calibration Guidelines. IAEA Safety Standards Series
- Occupational Safety and Health Administration. (2023). Worker Radiation Protection Standards. OSHA Publication 1075
- Radiation Safety Society. (2022). Best Practices for SRCM Setting Adjustment and Calibration. RSS Technical Bulletin No. 18


